• HOME
  • KITCHEN SHOP
  • Recipes
  • Blog
  • About
Menu

GARLIC PRESS JESS

  • HOME
  • KITCHEN SHOP
  • Recipes
  • Blog
  • About

breakfast obsession: three ingredient banana power pancakes

May 6, 2016

Making pancakes will forever hold a special place in my heart. For the few short years that I was an only child, my dad and I would make pancakes every Saturday morning. As a kid, I remember the magic of watching the soupy batter transform into a fluffy stack of deliciousness, the sizzle of the butter as batter hit griddle, and the excitement of "the flip" to find those crispy golden edges on the pancake underbelly. My favorite part of pancake making was the little dribbles of batter that would hit the hot griddle and become tiny bites of crispiness. I liked these so much that I my dad and I named them “dingle-hoppers,” and I requested we make as many of these baby pancakes as possible.

The sizzling sound of batter hitting griddle never fails to take me back to those happy Saturday morning memories with my dad… and that's probably one of the reasons I’ve been making these pancakes at least once a week since I discovered them a few months ago. Besides an excuse to reminisce, the simplicity of the ingredients, lack of measuring, and satisfying nature of these babies keeps me coming back week after week. Sure - some would argue they’re not comparable to real pancakes, but I think they’re just as good, especially because you can eat a full stack without feeling like you need a nap afterwards! Note that they do taste like banana, so if you don’t like bananas, they might be a no-go for you (but I say you should still try them!).

THREE INGREDIENT BANANA POWER PANCAKES
Recipe based on this guide from The Kitchn (although the olive oil + salt topping was my idea... I know it might sound weird but it's SO GOOD - give it a try!)

Ingredients:
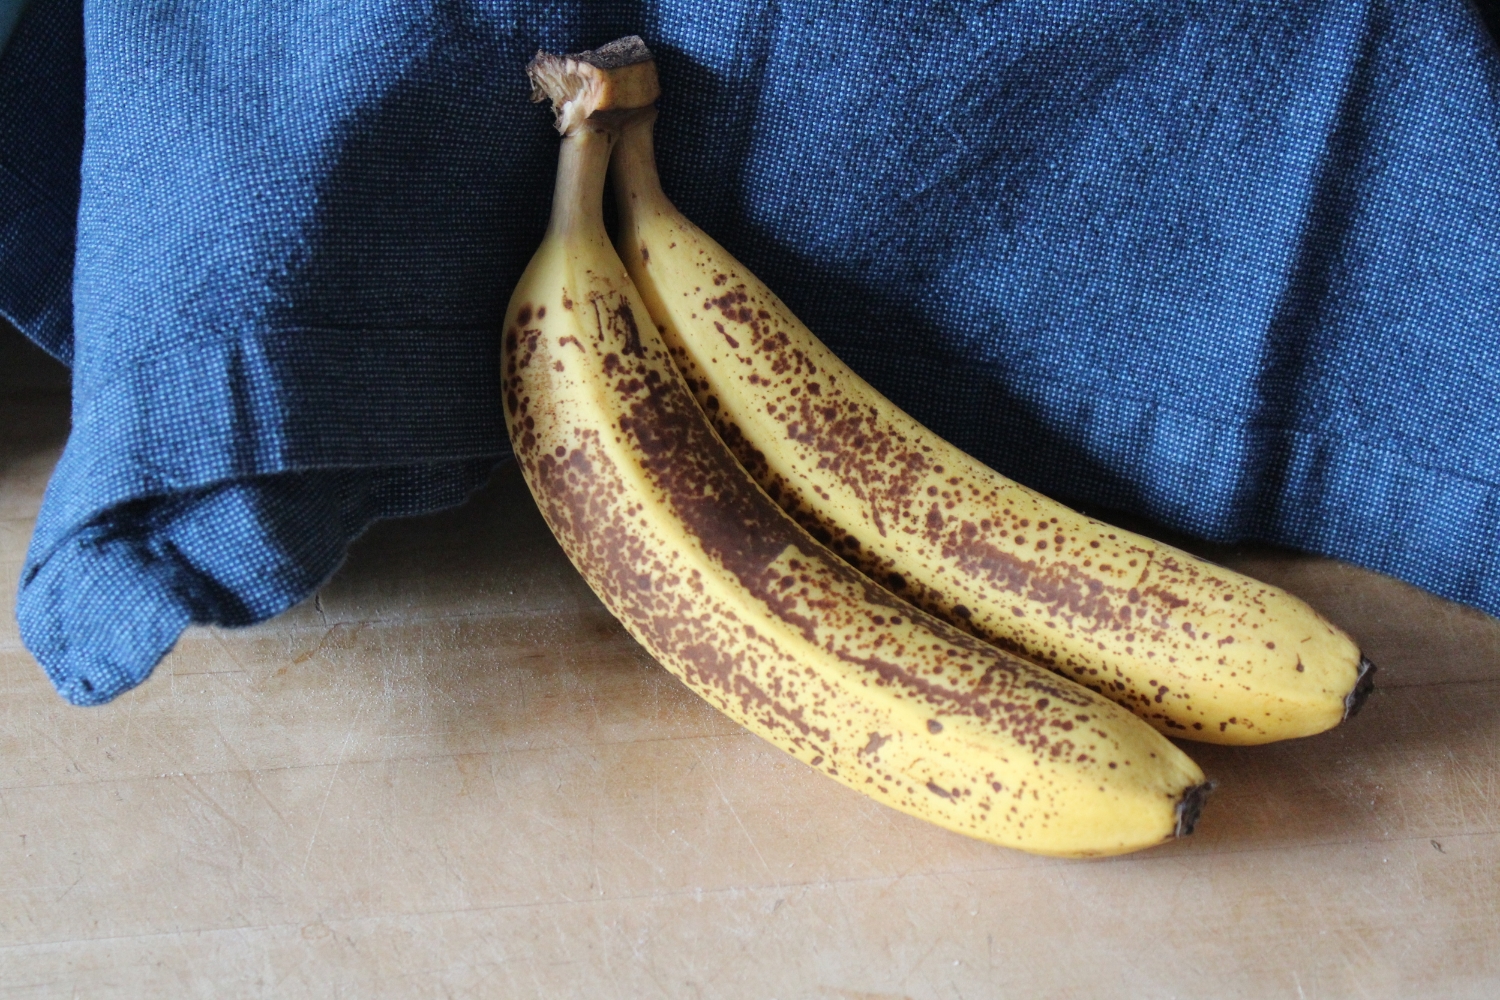
- 1 banana, at least ripe enough to eat, but a brown one is fine too
- 2 eggs
- dash of cinnamon (I consider this an essential ingredient, but if you don't like cinnamon, you could certainly leave it out)
^I usually double this and make extra to eat the next day or for a snack

+ butter or neutral oil for cooking

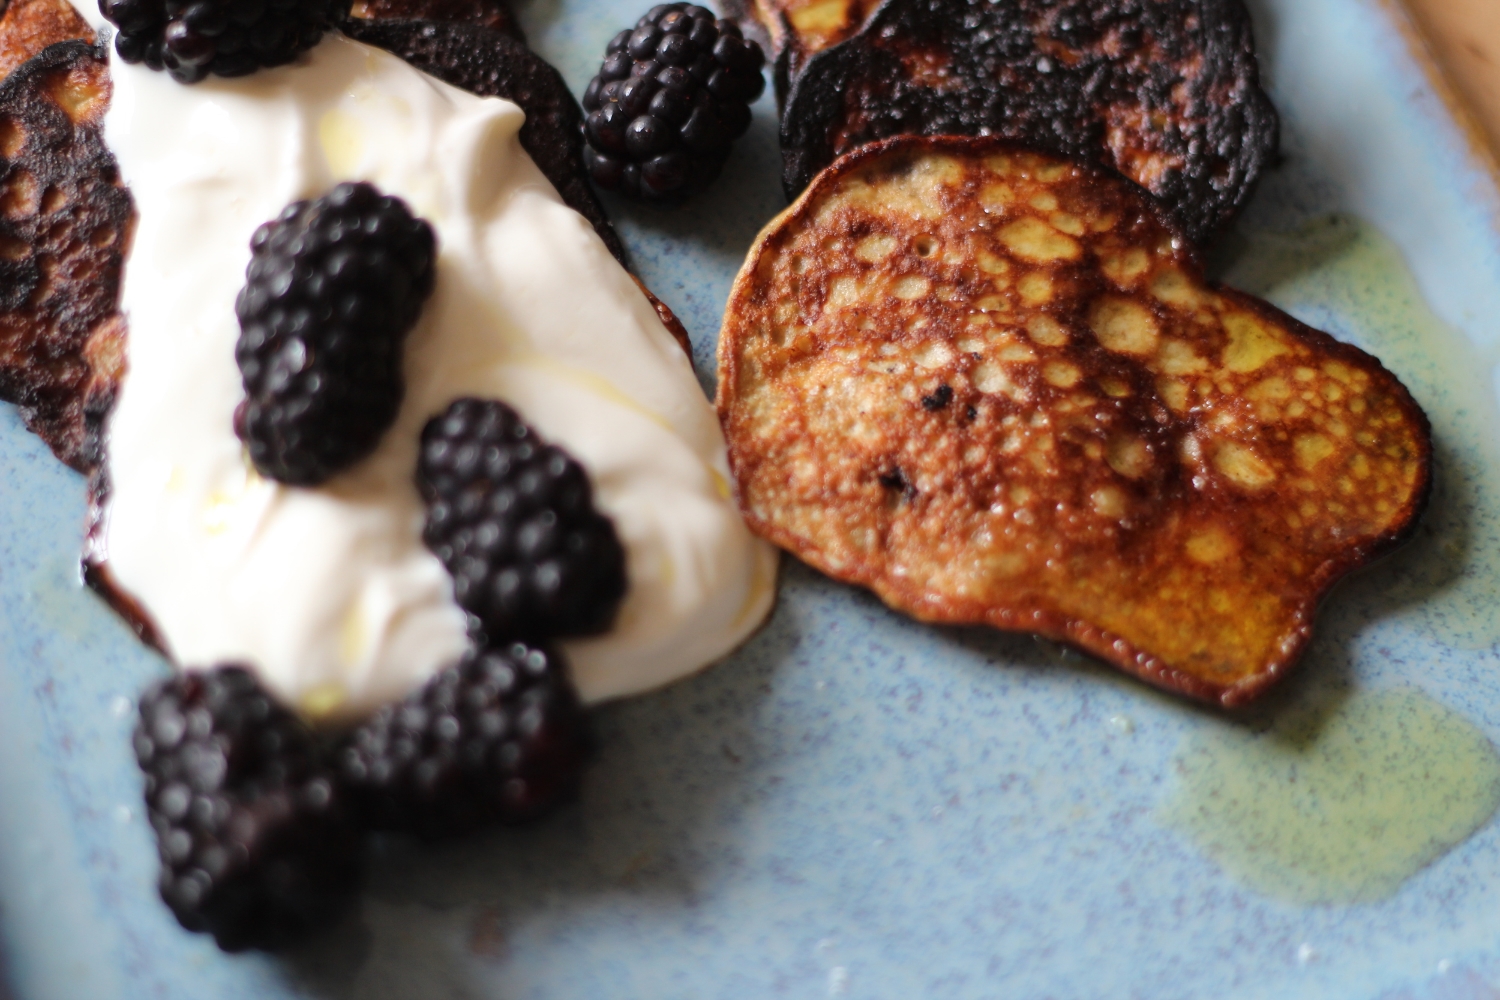
To top it off, I recommend:
- olive oil + salt
... but you could also do nuts, yogurt, maple syrup, berries, or whatever you like!

Tools and stuff:
- medium bowl
- fork and spoon
- thin spatula for flipping
- griddle, cast iron pan(s), or other wide non-stick pans

IMG_0636.JPG
IMG_0653.JPG
IMG_0652.JPG
IMG_0657.JPG
IMG_0663.JPG
IMG_0665.JPG
IMG_2211.JPG
IMG_0636.JPG IMG_0653.JPG IMG_0652.JPG IMG_0657.JPG IMG_0663.JPG IMG_0665.JPG IMG_2211.JPG

Instructions:

  1. Place banana(s) in a medium bowl and mash with a fork until it’s as liquified as possible. 
  2. Add cinnamon and mix in.
  3. Crack eggs into the bowl, right on top of the banana mixture. Using the fork, break the yolks and gently scramble the eggs until combined, trying not to dip down into the banana (but don’t worry if you do). Sometimes I add a pinch of salt here to help break up the eggs. Once the eggs are mostly scrambled, mix down into the banana and stir until fully combined. There might be some egg whites that don’t blend completely - don’t worry about it.
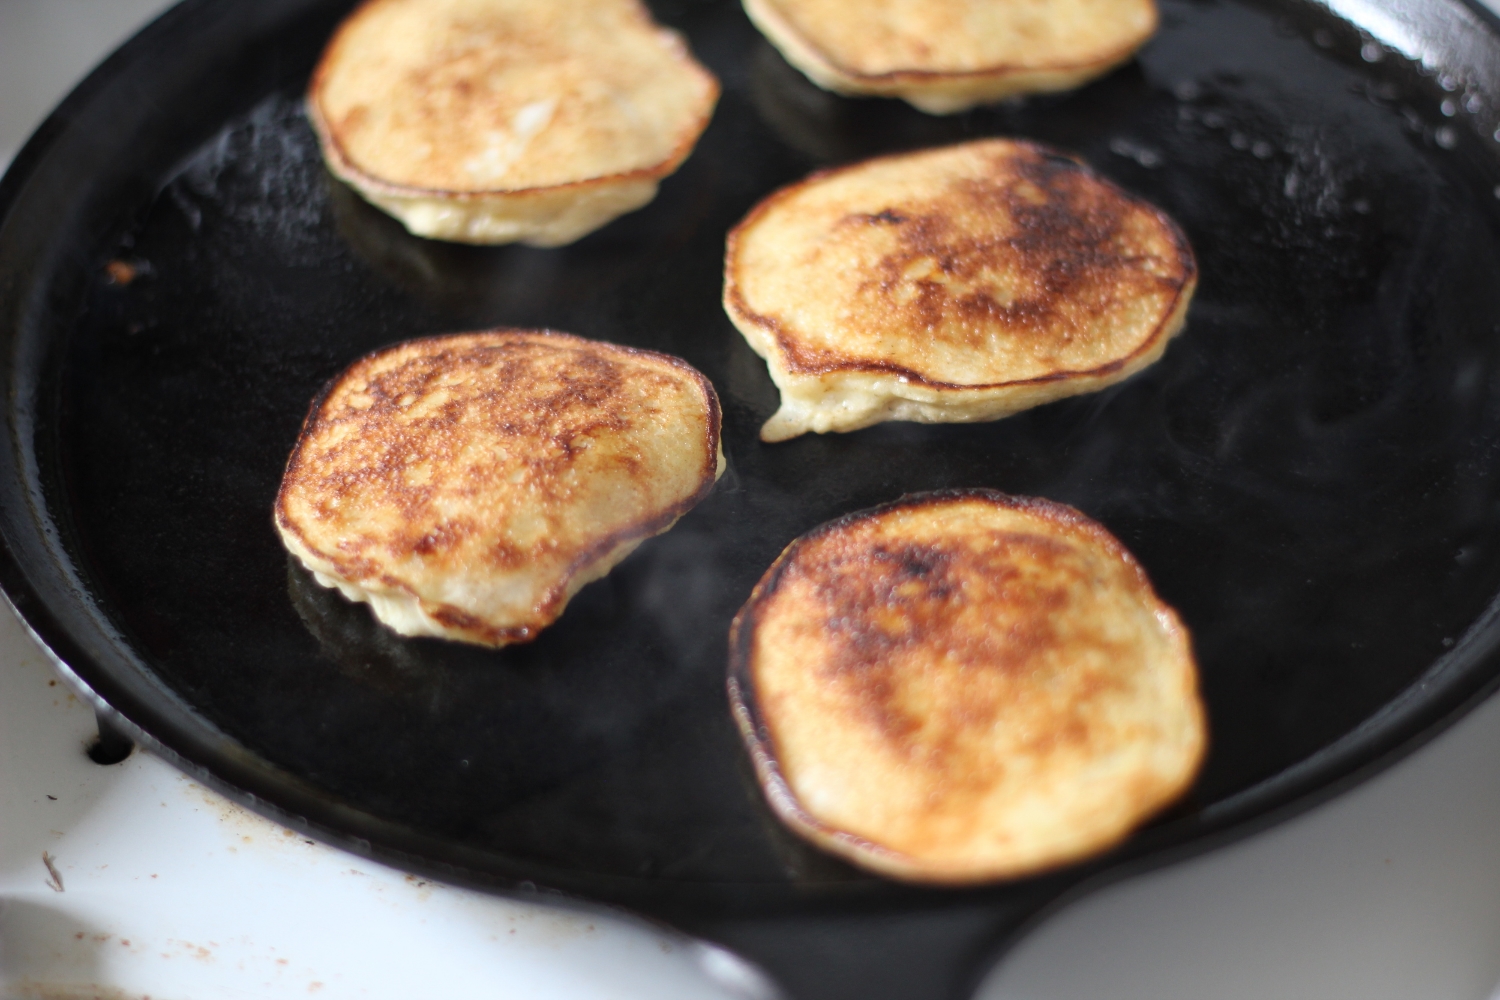
  4. Heat up your griddle or cast iron/other nonstick pan on medium high. Lightly coat the griddle/pan with butter or cooking oil of your choice. 
  5. Spoon batter onto the griddle using a normal size spoon. The batter will spread pretty thin so it’s best to keep the pancakes small. Allow the pancakes to cook for a minute or two (you can gently check the edges for done-ness), then carefully flip them. They are much more delicate than normal pancakes but as long as the first side is golden, they should flip just fine. 
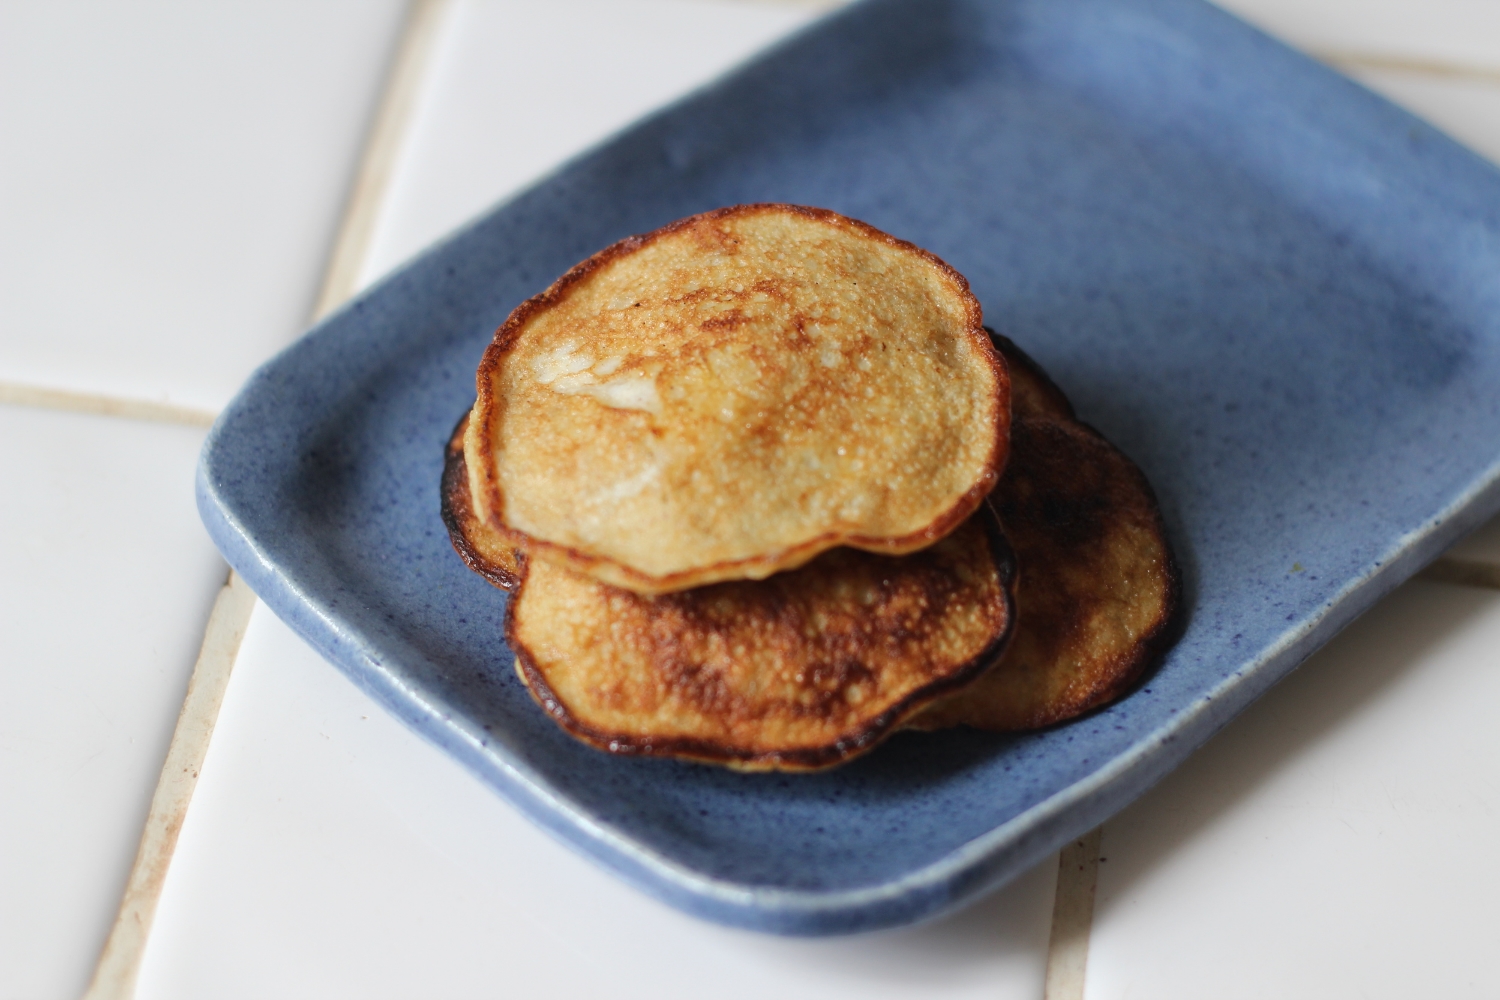
  6. Cook for another minute or so until done, then stack on a plate. Continue cooking pancakes, adding more butter/oil as needed to keep the pan lightly coated - this is what gives you the crispy edges! Note that because these pancakes are so thin, they cool pretty fast, so when you’re done with all the pancakes, you may need to rewarm them really quick on the hot griddle before eating.
  7. When you’re ready to eat, arrange in a pile or stack, drizzle with olive oil and a pinch or two of salt. The pancakes are already a little sweet from the banana, so I love this savory topping, but you can definitely top with whatever you like!

Additional notes: 

  1. I find that for one person, a double batch usually makes enough for two breakfasts plus a few “snack” pancakes, so adjust your quantities as needed depending who you're cooking for. The ratio is 2 eggs for every 1 banana - pretty easy! Store in an airtight container in the fridge and the next morning you can warm up in the toaster oven or pan in a few minutes.
  2. I’ve experimented with adding a bit of baking powder at the same time as the cinnamon - it makes the pancakes rise nicely while cooking, but they lose the fluffiness as soon as you take them off the heat, so I left that out of this recipe, but feel free to try on your own (plenty of other ideas/suggestions in the Kitchn guide)! If you want to add other spices, make sure you add them to the banana BEFORE you add the eggs, otherwise you’ll get little clumps of powders, which are really annoying to break apart.
  3. If you have a griddle, this will help make the pancake-making process quicker! If you’re like me and don’t have a griddle, I’d recommend using at least two pans going at once to speed the process. If you’re using cast iron, the good news is that the pan stays pretty clean, I just let it cool down, wipe excess oil with a paper towel, and call it a day!
In my go-to recipes Tags gluten free, dairy free, breakfast
1 Comment
beautiful cacao beans

beautiful cacao beans

the making of chocolate, part two: from beans to bars

October 23, 2015

It’s about time I told you about part two of chocolate making, also known as THE FUN PART! Warning: you will very likely feel compelled to go out and buy a chocolate bar after reading this post... SORRY!

We'll start where we left off - you may remember the final step of part one was drying the beans. Once the beans are dried, they are then stored until we decide to make chocolate. (At this point, I am pretty sure you could also sell them as “raw cacao” if desired.) Here at the farm, they store the beans for up to a year, so when we made the chocolate in these photos, we were actually using beans from last year’s harvest.

Making chocolate from the raw cacao beans takes two days, and at the end of each day there is a special “treat” that happily involves some waste-reducing cleanup of the chocolate :)

DAY ONE

step 1: roasting & cracking

First, we roast the beans to bring out their rich, delicious flavor. Here at the farm we have a very small roaster (about the size of a toaster oven) that holds only 2.5 pounds of beans, so for one batch of chocolate we have to do two rounds of roasting, each of which takes about 30 minutes. So, one batch of chocolate around here requires about 5 pounds of raw cacao beans.

After the beans are roasted, we let them cool slightly, and then crack them to remove the shells. Each cacao bean has a thin shell that coats the "meat" of the bean - referred to as the nib. You can crack the roasted cacao beans easily just by rolling them in your hands. The shell is very thin and both shell and nib break easily into small pieces.

Rather than cracking by hand, we have a cool gadget called a "CRANKANDSTEIN" that helps us quickly crack the beans. It's essentially a funnel that feeds into rollers powered by a hand crank. 

View fullsize IMG_4080.JPG
View fullsize IMG_4084.JPG
View fullsize IMG_4085.jpg
View fullsize IMG_4089.JPG
View fullsize IMG_4091.JPG
View fullsize IMG_4094.JPG
shells and nibs out of the CRACKANDSTEIN

shells and nibs out of the CRACKANDSTEIN

step 2: winnowing

So now we have cracked shells and nibs in a large bowl. Though you can eat the shells if you want to, all the flavor is in the nibs, so we need to separate the two. In chocolate shops, they have machines to do this, but here we use a hairdryer! We take the bowl outside on a clean counter and spin the bowl while gently agitating the nibs with the hairdryer blowing on the surface. The feather-light shells fly out onto the counter and the heavier nibs remain. 

IMG_4103.JPG
IMG_4115.JPG
IMG_4125.JPG
IMG_4128.JPG

Periodically, we stop and swipe up the shells on the counter to save them. You can brew delicious tea out of these! It is lightly chocolatey and delicious as a faux-dessert! Lately I've been making iced tea with it and throwing in an orange slice - so good!

View fullsize mostly nibs
View fullsize shells

step 3: grinding

Now that we have mostly nibs (a few shells inevitably remain, but that's ok), it's time to grind the beans. Una and Leon (the farmers extraordinaire who I'm working for) use a Champion Juicer that they reserve solely for chocolate making, and it works amazingly well! The result is called "chocolate liquor," a technical term in the chocolate world for "ground cocoa mass" - it has nothing to do with alcohol. Start reading your chocolate bar ingredient labels and you'll likely see this listed.

ground nibs, aka chocolate liquor, fresh out of the grinder-juicer

our 5-pound batch of raw beans resulted in about 8 cups of chocolate liquor

our 5-pound batch of raw beans resulted in about 8 cups of chocolate liquor

step 4: ingredient prep

Next it's time to quickly prep the other ingredients. Una's recipe for chocolate involves three ingredients - this chocolate liquor that we just made from our organic cacao, organic cocoa butter that she buys from another a small chocolate company, and organic sugar. 

Cocoa butter is what you would get if you took the ground nibs and separated out the fat (this requires special equipment). As soon as I saw it, I realized why white chocolate is white and still allowed to be called chocolate!

This is cocoa butter in its solid form. Looks kinda like white chocolate, right?!

To prep our ingredients, we measure them out and melt the cocoa butter. Amazingly, it turns slightly brown when melted - I was fascinated by this stuff!

melted cocoa butter 

melted cocoa butter 

organic sugar

organic sugar

step 5: melanger time

In our final step for day one, it's time to mix everything together! For this, we use a melanger - another special piece of equipment used for chocolate making. It's essentially a spinning bowl with a stone bottom and cylindrical stones inside that slowly grind the chocolate and other ingredients into smaller and smaller particles. Once the machine is up and running, we add the ingredients slowly, a little of each at a time, until everything has been added.

IMG_4140.JPG
IMG_4143.JPG
IMG_4154.JPG
IMG_4158.JPG

We let this machine run for about 24 hours, periodically using a special tool to scrape down the sides of the bowl. By the afternoon, I could see the mixture becoming smoother. 

the top red one is a special scraper - we'd stick this in along the side of the bowl as the machine was running to scrape down the sides

the top red one is a special scraper - we'd stick this in along the side of the bowl as the machine was running to scrape down the sides

it's getting smoother!

Now it's time for the day 1 treat! To "clean" out the juicer-grinder where we first ground the nibs, we put frozen bananas through it to make banana-chocolate soft serve. No sweetener needed, and let me tell you it's AMAZING!

I was SO excited to eat this I didn't take the time to get a great photo...

I was SO excited to eat this I didn't take the time to get a great photo...

DAY TWO

It's been 24 hours and IT'S READY...

IMG_4193.JPG

isn't it just... GORGEOUS?! BREATHTAKING?! Making you want to run to the nearest store for a good bar of dark chocolate?!

We wipe out the molds and prep some with our macadamia nuts and coffee beans:

View fullsize IMG_4183.jpg
View fullsize IMG_4184.JPG
View fullsize IMG_4190.JPG

step 6: tempering

This is the trickiest part of the chocolate-making. We need to cool the chocolate down slowly to just the right temperature before we put it into the molds. If we don't do it correctly, when it hardens the chocolate can "bloom" - making that white, gritty stuff you may have seen on older bars before. You can still eat it that way, but it's not as pretty.

To slowly cool it, we spread about a third of the chocolate mixture on a granite slab and mix it around, agitating it for several minutes. Then we add another third and do this again. Finally we add these back to the remaining third and, again, mix to even out the temperature. 

IMG_4201.JPG
IMG_4212.JPG
IMG_4205.JPG
IMG_4206.JPG
IMG_4218.JPG
IMG_4201.JPG IMG_4212.JPG IMG_4205.JPG IMG_4206.JPG IMG_4218.JPG

step 7: piping into the molds

This is the MOST FUN PART! We pour the tempered chocolate into a pastry piping bag (keeping finger tightly on the end!) and then pipe the chocolate into the molds. We had already prepped the molds with our own roasted coffee beans and macadamia nuts. I absolutely love the preciseness required for this task - my perfectionist tendencies found their outlet!

IMG_4247.JPG
IMG_4226.JPG
IMG_4229.JPG
IMG_4223.JPG
IMG_4232.JPG
IMG_4233.JPG
IMG_4236.JPG
IMG_4247.JPG IMG_4226.JPG IMG_4229.JPG IMG_4223.JPG IMG_4232.JPG IMG_4233.JPG IMG_4236.JPG

step 8: pop & package

Finally, after a few hours, we pop the chocolates out of the molds, wrap up the bars, pop the specialty ones into bags and call it a day!

IMG_4253.JPG
IMG_4259.JPG
IMG_4258.JPG

And last but not least - our "cleanup" treats for day 2 are...

THE MOST DELICIOUS CHOCOLATE MILK made by cleaning out the piping bag and...

Chocolate covered dried bananas made by swiping the extra chocolate out of all the bowls. YUM.

And now, my chocolate conclusions! Congruent with most of my realizations here on the farm - making chocolate from scratch is HARD WORK! You need special equipment that you would only use for chocolate making, and if one thing goes wrong, you might lose your whole batch (for example - we had an issue with the melanger and ended up spending an hour looking for spare parts from friends and in the hardware store. If we wouldn't have found a solution we would have wasted all that cacao!). 

Despite the work, chocolate is simply MAGICAL and I can see why people become chocolatiers. I could have piped into those molds all day - I couldn't get enough! This is definitely my favorite thing we've done on the farm. The smell alone is enough to make you happy all day long. Hope you enjoyed this, and stay tuned for the next installment in my "educational" type posts: coffee picking and processing!

PS. To my professional and/or pastry friends who may be reading this, I apologize if I got any of the terms wrong and please correct me if I did! Thank you!


In {garlic press} adventures
2 Comments
kabocha squash - not quite ripe
the squash grows on the garden wall
baby squash
baby squash

where there are flowers, a squash will grow!

ripe squash - ready to eat
kabocha squash - not quite ripe the squash grows on the garden wall baby squash ripe squash - ready to eat

double duty kabocha squash soup

October 16, 2015

A cool morning breeze swept by as I enjoyed my coffee on the lanai a few mornings ago. This was the closest thing to "fall" I've felt this October here in Hawaii. Instead of picking apples this year, I'm harvesting squash. We have a TON of it. It's a variety called kabocha squash, which is one of my favorite kinds because it cooks so quickly. Most of you should be able to find it at your local farmers market (preferably) or grocery store. It looks like a pumpkin and can be green, orange, or multicolored. 

This is a super easy recipe that I came up with while here in Hawaii. I'm so lucky that (for now) I'm able to pick the lemongrass, ginger, kale and herbs straight from the farm! It really is amazing to go to the garden instead of the fridge for my ingredients!

Note: I know that fresh lemongrass is a rather obscure ingredient. I've found it at Asian markets and the Asian stands at farmers markets (in San Francisco), and at Whole Foods on the east coast. If you can find it - I'd recommend trying it just for fun! If not, you can use preserved lemon, or just go without either.

Double Duty Kabocha Squash Soup

Active time: about 35 minutes
Total time: about 50 minutes

Ingredients:
- one large kabocha squash
- coconut oil or butter, whatever you prefer
- fresh garlic, 3-6 cloves (depending how much you like garlic)
- fresh ginger, about 1 tablespoon grated or minced
- about half a bunch of kale (roughly two handfuls chopped)
- half a (13.5 oz) can of coconut milk (full fat for creamier soup, light is fine if you're going lighter) OR you can use 3/4 a container of one of these kinds of coconut milk
- a few sprigs of fresh rosemary and/or sage (ideally two of each)
- 2-3 stalks of fresh lemongrass OR 3 wedges of preserved lemon (optional but recommended)
- water

Tools and stuff:
- large pot for soup
- chef's knife and large cutting board
- large spoon
- can opener if using canned coconut milk

Instructions: 
1. Chop your squash into roughly bite-size chunks. Chopping the squash is the most annoying/time-consuming part of this recipe so it's great that we'll get it over with first. One of the great things about kabocha is that you can actually leave the skin on if you want to save time & effort. You'll want to cut off any barnacle-looking growths and/or spots, but otherwise, I usually just cut off the extra-thick areas of skin and leave the rest on. Sometimes I do cut it all off - experiment and see what you prefer. Below you'll find an instructional photo series of how I chop my squash. 

 dig pointy end of knife in next to the stem and cut off the end

dig pointy end of knife in next to the stem and cut off the end

 continue cutting off chunks, working around the stem

continue cutting off chunks, working around the stem

 scoop out seeds and strings. reserve these insides so you can wash, dry, and toast up the seeds later!

scoop out seeds and strings. reserve these insides so you can wash, dry, and toast up the seeds later!

 remove any bruises/bad spots/barnacles, and/or all the skin if you wish

remove any bruises/bad spots/barnacles, and/or all the skin if you wish

 note that if you're removing the skin, you'll need a knife. a peeler will NOT do the job here

note that if you're removing the skin, you'll need a knife. a peeler will NOT do the job here

 next, I slice each section into long slices like this 

next, I slice each section into long slices like this 

 from there, cut your stack into sticks, and then chunks

from there, cut your stack into sticks, and then chunks

 the final product - by no means are they uniform sizes, but it's totally fine for this soup!

the final product - by no means are they uniform sizes, but it's totally fine for this soup!

 dig pointy end of knife in next to the stem and cut off the end  continue cutting off chunks, working around the stem  scoop out seeds and strings. reserve these insides so you can wash, dry, and toast up the seeds later!  remove any bruises/bad spots/barnacles, and/or all the skin if you wish  note that if you're removing the skin, you'll need a knife. a peeler will NOT do the job here  next, I slice each section into long slices like this   from there, cut your stack into sticks, and then chunks  the final product - by no means are they uniform sizes, but it's totally fine for this soup!

2. Crush and mince your garlic and ginger; chop kale into ribbons.
- If you're using lemongrass, rinse and dry it, then trim the ends and remove any dry outer layers until you have more tender, pale yellow/green stalks. Make sure to include the most tender part - usually the bottom of the bulb, and cut into pieces that are about four inches long (this does NOT need to be exact). Then pound the stalks with the back of your knife to release the oils and flavor. 
- If you're using preserved lemon, pick out about 3 wedges and mince.

minced ginger

minced ginger

fresh lemongrass!

fresh lemongrass!

minced preserved lemon (great option if you can't find lemongrass)

minced preserved lemon (great option if you can't find lemongrass)

3. Get out your big soup pot. Heat the oil on medium and add your garlic and ginger. When they start to become fragrant, add your preserved lemon (if using). After another minute, add the squash and stir to coat.

 garlic + ginger + coconut oil

garlic + ginger + coconut oil

 once fragrant, stir with squash to coat

once fragrant, stir with squash to coat

4. Now add your half can of coconut milk. (If you want a more decadent soup, feel free to add the whole can, but I usually save it for something else like a coconut key lime pie - recipe coming soon!) Then fill up the pot with water so that you almost cover the squash. You want a couple of inches of room at the top of the pot.

5. Stir well to mix the coconut milk and water together. Now add your sage, rosemary, and lemongrass (if using). Gently push them under the liquid so they're submerged, but don't stir. (This makes it easier to remove them at the end.)

herbssssss

herbssssss

6. Turn up the heat to high and bring to a boil - should take a little under 10 minutes. Once at a boil, turn down to simmer (small bubbles should be coming up). Cook for another 10 minutes, then check the squash with a fork. The goal is for the top-most squash to be tender but not totally falling apart. If needed, give it another five minutes. When it's ready, use your spoon to gently skim out some of the top-most squash into a heat-proof tupperware (or bowl). This is the "double duty" part of the recipe - you're reserving these chunks of squash for other uses - throw them in salads, eat with eggs, season with spices and make a side dish, whatever you like! I usually take about a cup and a half but take as much or as little as you want!

7. Now, carefully remove the rosemary and sage. (If you'd like, you can let the sage cool a bit and then chop and add leaves back to the soup.) Then, with your spoon, start to gently mash the squash towards the bottom of the pot - the lemongrass helps with this too. The squash should easily mash and the soup will become even creamier and brighter orange.

8. Finally, add your chopped kale. Again, use the spoon to submerge the kale and cook soup for another minute or two until kale is bright green. Turn off the stove and you're done! Now - you don't want to serve or eat the lemongrass, but I recommend keeping it in the soup when you store it so that it has a chance to impart even more delicious lemongrassy flavor! 

finished product!

finished product!

FInal tips: You likely have a pretty big pot of soup at this point, and it will keep for a solid week in the fridge. I've been making and eating large pots of this all by myself so I've come up with a few flavor changers/enhancers to keep this interesting throughout the week: 
a) For easy protein - when reheating, add some chopped tofu and cook for an extra 5 minutes to make sure it's heated through
b) Just before eating, add a few dollops of pesto or green sauce/salsa verde or a handful of fresh basil and stir in slowly
c) Top with a fried egg (or poach an egg in the soup while reheating) and serve over quinoa
d) Add kalamata olives and chunks of avocado on top - sounds weird but really good! (especially the olives!)

with fresh basil added - so flavorful!

with fresh basil added - so flavorful!

In my go-to recipes Tags gluten free, soup, dinner, entertaining
1 Comment
← Newer Posts Older Posts →
Featured
IMG_7074.JPG
Cauli-faux-caccia: the recipe that came to me in a dream!
the tinder message I'm still thinking about 1 year later 🔥
IMG_5175.jpeg
Magic Cold Elixir / how I stop the sniffles before they start
the "diet" I live by
91DD3A77-66D3-446C-9BA1-792E415598A0.jpeg
CAESAR SALAD DRESSING, TWO WAYS
7569A20C-08EC-4201-B5B7-871CA173D477.jpeg
Beginner's Guide to Kombucha
showstopper stuffed squash
GIFT GUIDE 2019: for the kitchen and beyond
IMG_5428.JPG
The 2-Minute Habit that Saves Time, $, and Energy in the Kitchen
fullsizeoutput_223b.jpeg
Lemon Bars, a Homeless Guy, and the Big Questions (An Essay)
IMG_6146.JPG
Five Minute Red Curry Sauce, hello old friend!
IMG_5390.JPG
Resourcefulness to Preserve my Reggiano (Parmigiano-Reggiano, that is)
Brandless Dinner-24.jpg
Getting back to blogging
IMG_6720.JPG
WHEN RECIPES GO WRONG: SALT, TASTE, QUESTION!

BLOG ARCHIVE


© Garlic Press Ventures  •  privacy policy  • terms of use •  follow on Instagram